Continuing with my 18th century foundation garments lets take a look at the stays I made. As this was only my second ‘corset’ I decided to stick with a pattern again, although I ran into no issues scaling up the pocket hoops from Corsets and Crinolines I thought a corset with many different boning channels would be more of a challenge, a challenge I will take on at another date.
I ended up completing this project over a weekend (under forty eight hours) which I’m pretty pleased with! I did intend for this to be more of a spread out project but I just really got into the sewing and was happy to power though the whole weekend for it’s completion.
I used Butterik’s B4254 which is apart of the ‘Making History’ collection. I realised this pattern isn’t 100% historically accurate but I just wanted to used it as a starting point and ease myself into the procedures used and the period itself.
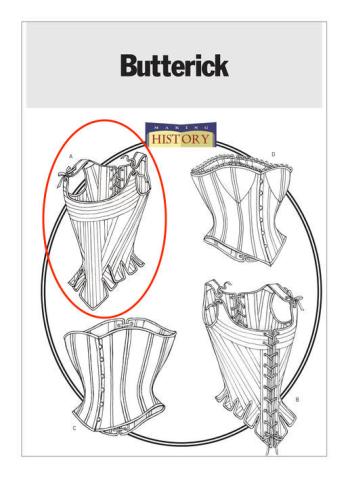
I used version A (circled) which just has a back opening rather than front and back. I choose this for two reasons, the first being I wanted to create that stylistic ‘shelf’ look where the bust is pushed upwards resulting in cleavage and you get a very defined shape of the bust and then immediately flattening down into the waist. Also I thought that having a flat uninterrupted front would mean that when garments are worn over top they would sit flat and not bulge or pucker where View B has an opening, I’m not sure if this would happen or not but at the time I considered it as a contributing factor to choosing View A instead. The second reason being I didn’t want to hand sew that many eyelets! I’m very particular when it comes to historical dress, I like my eyelets hand sewn and colour coordinated. View A has 20 eyelets total where as view B has 40 total, I think my decision based on eyelets is pretty justified!
Construction

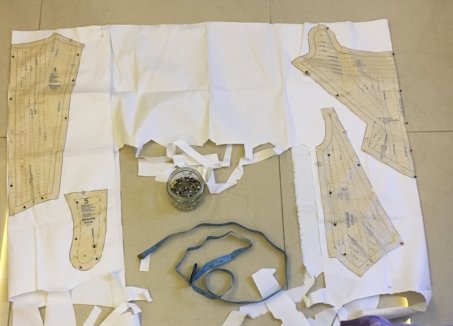
The stays are made up of four pattern pieces the centre front, side, centre back and the shoulder strap. I decided to cut the pattern out in a size 10 although I measured to be a size 12. My reason for doing this was that when I made my 1860’s corset (Simplicity 1139) I used a size 12 and found that the corset was too large and wouldn’t cinch me in as much as I had hoped for, it was a bit of a risk but I had high hopes that it would turn out okay!
I had just enough cotton coutil left over from my previous corset to squeeze the patterns pieces onto. Thankfully I was able to get each pattern piece to follow the indicated grain line. I have kept the left overs just incase, this coutil is on the more expensive side so I try and get the most out of it!
Next I marked the boning channels unfortunately I didn’t have any carbon paper or a tracing wheel at the time and as I wanted to keep this as a weekend project I elected to use the pin prick method instead… This was time consuming. It took me around three hours to do but now I always have carbon paper on hand and won’t make that mistake again! The channels were marked with a heat removal ‘friction pen’, I love these pens so much I’ve never had any issued with them not removing/staining my fabrics.


I then cut the lining out and this is where I went a little wrong, I decided to use a poplin fabric as lining. Yeah I know bad decision. A (100%) cotton would have been a better choice as the poplin is too thin and fragile. So far I’ve only had two boning channels suffer breakouts, luckily they aren’t in positions of friction so I’m not stabbed while wearing the stays. I might re-line the stays before binding the edges but I’ll talk about that later.
I cut two CF lining pieces out, that was unintentional (didn’t read the instructions) I did not double the lining up.

Next I sewed all the seams up on both the top fabric and the lining. You can really see just how light weight my chosen lining material is here too. I look back and cringe!
The lining is then basted the lining to the top fabric.

And now for the main event, sewing the boning channels. I would like to thank the Butterick gods for including a guide which indicated the correct order to sew the channels. This is so extremely important as the boning is inserted as you sew because with each channel sewn you would often close off the openings to another channel. The only time I actually found this tedious was when I sewed the horizontal bones at the top of CF, my boning kept trying to twist while I was sewing which was a pain but manageable. I used synthetic whalebone as boning which was left over from my 1500’s ensemble. It took me seven hours to sew the channels inserting the boning as I went. I spent a total of 13 hours on the stays on the Saturday.
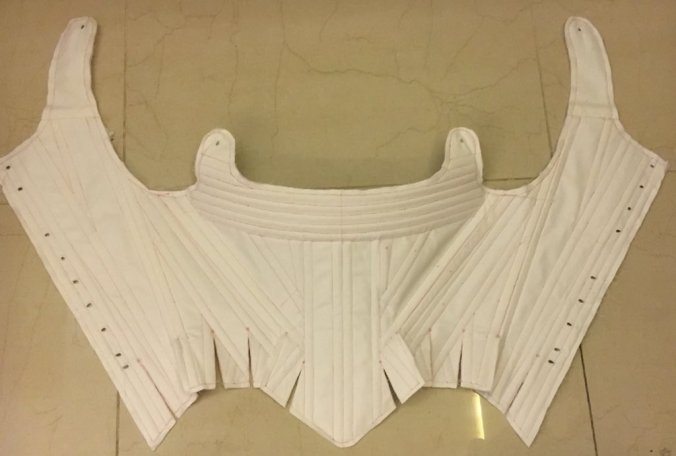
Then on the Sunday I spent all day hand sewing the eyelets. I am aware I’m missing an eyelet on either side in the above picture, when ironing the piece earlier in the construction process I removed my eyelet marks! As soon as I realised this I remarked the placements and punched the holes and sewd over them. I don’t have a more recent picture I’m afraid!
To remove the remaining pen from the stays I set my iron to steam and ironed over the stays, making sure to move the iron quickly as to not heat the plastic boning up. The pen may want to stick to the areas you sewn directly over it but with a firm press it will disappear!
And thats the stays finished! (To a functional state)
I still need to bind the edges of my stays and I’ll be using chamois leather to do this, thank you Hannah from FabricnFiction for recommending that to me! I did originally attempt to do it with cotton bias binding but it did not go to plan, unfortunately since then University work has picked up and I haven’t gotten around to finishing them off. And that was in late October last year, I do have a week off coming up soon so I’ll try and get them done then and update my blog appropriately. I may also make a new lining to sit over top of the old one and sew it in when I hand stitch the chamois leather binding into the stays.
Here are some worn photos anyway along with my pocket hoops and chemise.


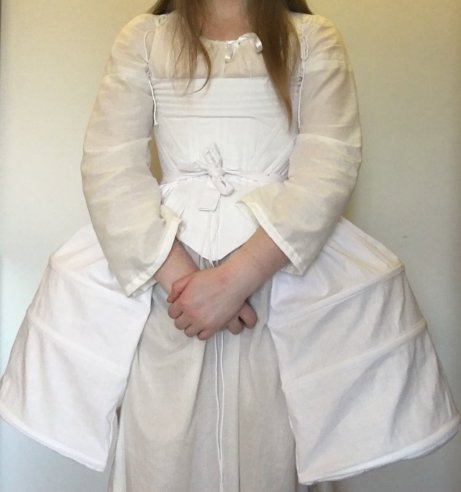
Also bonus picture/appreciation for the reduction these stays give,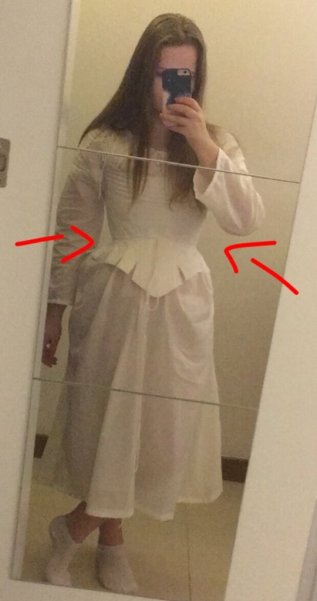
Look at my waist in comparison to my hips!!! I was quite surprised to find they take three inches off my waist which I wasn’t expecting from a commercial pattern. I can get very close to a full closure lacing on my own with about and inch gap at the very bottom but from two thirds of the way up the stays make a full closure. I am fairly certain I could get a full closure with someone helping me into them which will likely be my mum when I go home for Spring break!
I’m pretty happy with the outcome of these stays and I’m sure they’ll look better once the edges are bound. I’ve familiarised myself a lot more with my corsetry books and the ones available at my university library so I want to make it a personal challenge for myself to stop using commercial (corset) patterns and instead use patterns from Norah Waugh’s books etc. I feel as though I’ve improved a lot at sewing the past year and my understanding of pattern manipulation has grown at lot too and using commercial patterns is just a security blanket for me now when I could be further challenging myself and extending my skill set and I want to move away from that comfort zone. I would like to complete another corset this year so I could compare it to the various ones I made last year.
And thats it!
Thank you for reading and I’m sorry for my radio silence, hand in for my current unit is Monday so I can catch up on older scheduled posts then!
-Nivera

I made view D of this pattern, and I so enjoyed seeing you make this view! I love the quality of your work, keep it up!
LikeLiked by 1 person
Aw thank you! I did originally have plans to make view D from this pack as well but have decided to give one of Norah Waugh’s corsets a go!
LikeLiked by 1 person
I keep seeing comments all over the internet that this pattern isn’t historically accurate, but nobody seems to mention in what way they’re problematic. They look almost exactly like Norah Waugh’s stays drawings to my untrained eye. What makes them inaccurate?
LikeLike
The pattern is actually quite historically accurate, I’ve also read quite a few bashful reviews of this pattern calling it out as awful and a historical reenactment actors worst nightmare. From what I can work out (with my beginner level historical costume experience) I believe it’s down to Butterick not (as far as I know) working with surviving garments to construct a working pattern. And also taking into consideration that the pattern must cover a wide range of sizes alters the authenticity taking into account the construction. Had I used a Norah Waugh pattern I wouldn’t have mentioned historical accuracy as I know her patterns as based on surviving garments of the era.
Like I said I’m not overly experienced in this area (yet) but that’s my interpretation of the pattern. I actually quite like it, it serves it’s purpose well and under a dress no one will know!
LikeLike
Glad to find you!
I have this same pattern and my mock-up is a little loose. I’ll make another a size smaller and see what I think of that. I might also fold the last “channel” beside the eyelets under, so that there’s another boning channel instead of that extra fabric and binding. What say the Hive Mind?
LikeLiked by 1 person
Hi!
I apologise for the late reply (university deadlines are around the corner and I missed this notification!)
If the mockup is a bit loose it would likely be more effective to take it in, that way you’d be fitting it more accurately to your body than relying on the size down being a better fit. Being that the pattern seams are straight they’re much easier to alter too!
I agree with folding the extra fabric at the centre back, it would also work really well if it were used to reenforce the eyelet channel when folded back. If it’s width was increased so it folded back just beyond the eyelet channel it would strengthen the fabric and help prevent any eyelets from tearing.
Best of luck with this pattern!
LikeLike
Hi – I’m about to make view A (very excited!) but can’t find anywhere what the best boning to use is? There seems to be a choice of width! Any help please? 🙏🏻
LikeLike
Hi Louise! That is super exciting! I’d recommend synthetic whalebone which is what I used, I’m fairly certain I used 5mm width in size but you can always check the width on the pattern. Ideally your boning should be 2mm in width smaller than the boning channel itself.
I wouldn’t recommend flat steel I think it would be too rigid, rigilene won’t be rigid enough and spiral steel could work but you will use a lot on these stays which could get expensive.
I hope thats helpful! Best of luck!
LikeLike